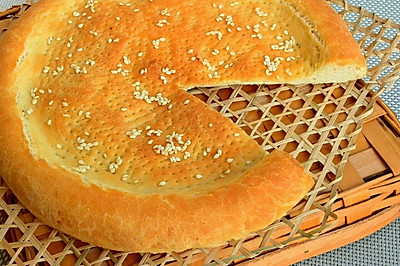
Original taste of onion Nang & rye onion Nang
(155791 views)
Nang is one of my favorite pasta. I like the original flavor of Cong Xiang Nang, milk skin Nang, and pastry Nang. This time in Xinjiang, I fell in love with spicy skin Nang, peanut walnut Nang, rose Nang. I eat Nang every day for a week basically. I can't get tired of breakfast. I've made Nang several times in recent weeks. I used the Nang needle bought in Kashi handicraft shop. It's good-looking and delicious. My own toothpick Nang needle also retired. Not an expert. Share my experience. Tips-1. The dough should be a little softer. Pay attention to adding water at the beginning. See Step 7 for details.
Cooking ingredients
Cooking Steps

Step1:Let's first put some photos of Nang related Xinjiang Travel. Zuo - the handyman who made Nang needle. Asked him to buy Nang needle and rolling pin; Zhong - the Nang roaster. In the hot summer, he was quick and ruthless. Shaping and embossing were integrated into the pit in one go; the Nang shop in the Nanshan Town of right Urumqi baked enough Nang to make people miss one year.

Step2:Go to the point. Make scallion oil - a half white onion diced in corn oil, boil slightly, turn off the color, turn off the heat. It can be eaten when it's cold. It can also be kept for about 1 week after sealing.

Step3:The original Nang flour yeast is mixed in a basin. Add water and mix it into a floccule, then knead it into a ball. Then knead it for about 150 times (personal experience). The ball will be smooth after kneading. First fermentation.

Step4:Original Nang - kneading actio

Step5:The original Nang is fermented once in summer for 78 minutes. It is 12 times longer in winter. The purpose is to relax and enlarge the dough by 1.5 times.

Step6:Original Nang - the dough weighs 310 grams. It is divided into two groups and gently kneaded into circles A kind of Roll the surface into a 3cm thick circle. Then shape it by hand. Look at the bottom ⬇️

Step7:Original Nang - hold the soft dough with the forefinger and thumb of both hands and turn it around. It will naturally form a thick edge. The cake will be put on the baking tray for use.

Step8:Rye, onion, Nang and rye flour yeast are mixed in a basin. Add water to make the dough flocculent and then knead it into a ball. Then knead it for about 150 times (still personal experience). The dough will be very smooth after kneading. First fermentation, one fermentation in summer for 78 minutes. In winter, it will take 12 times longer. The purpose is to relax the dough and make it bigger by 1.5 times. Figure 3 shows the fermentation.

Step9:Rye Nang - kneading actio

Step10:Rye Nang - the dough weighs 160g. It is divided into two groups and gently kneaded into circles A kind of Roll out the dough into a 3cm thick circle. This dough is very small. Then use the above shaping video to make a thick edge and put it on the baking tray for later use.

Step11:Nang cake is first coated with scallion oil, and then Nang needle is used to dig out a uniform pattern in the middle for the second fermentation.

Step12:Second fermentation to twice the size. Preheat oven for 1518 minutes.

Step13:It's out of the oven. It's delicious to eat while it's hot. It can be stored for 7 days after drying and ventilating.
Cooking tips:There are skills in making delicious dishes.
 Chinese Food