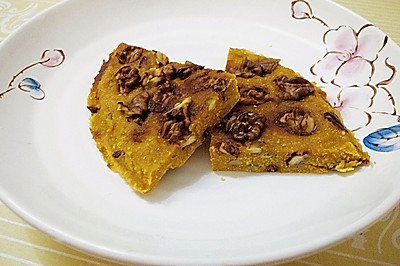
Pear shaped cookies
(158618 views)The day before yesterday, a Tao released our 99th Qifeng practice. Today, a Tao will release our 99th biscuit practice. Maybe it's a bit exaggerated to say the 99th kind. But Tao is really racking his brains to find freshness for his friends. It's like marriage or raising a child. Every year, we need to think of ways to give our daughter-in-law different plot people gifts. Every year, we need to think of ways to take our children to different places to travel and broaden our horizons. All this is for a long time. Shape biscuit is a kind of playing method that can make baking full of fun and keep long-term attraction. Maybe it's not for eating. It's just a little like the challenge of finishing different shapes. Even philately. Just like Tao likes collecting medals after marathon. But it is precisely the hobby of such a small crowd. If we persist, the results are often admirable. When I think back to my persistence, I will always give a long breath and say no regrets to myself.
Cooking ingredients
Cooking Steps

Step1:First, cut the butter into small pieces and soften them at room temperature (about 23 ℃). The softening degree is the degree that can be easily pierced with fingers. If in winter, the southern families with low room temperature and no heating need to use auxiliary means to soften, such as close to the heater, use the oven or microwave oven to soften with low fire, and use hot water to soften.

Step2:Add 40g sugar powder and 1g rose sea salt. Press and mix with a scraper first to avoid splashing sugar powder later.

Step3:Use the eggbeater to break up the butter at a low speed. It's not required to be completely dismissed here, because the requirements for crispness of shape biscuits are not high. Otherwise, it's difficult to shape them.

Step4:Break up 10g of the whole egg liquid in advance, and then add it to the butter twice.

Step5:Stir well before adding the second egg liquid, and then stir well.

Step6:Sift and add 110g of goldfish low gluten flour.

Step7:Use a scraper to cut and mix evenly until no dry powder can be seen.

Step8:The total weight of the dough is about 210g. It is divided into 130g original dough, 70g dough plus 3G Matcha powder, 10g dough plus 2G cocoa powder.

Step9:Knead the three dough and seal it with plastic wrap. Refrigerate and relax for 20 minutes.

Step10:Take out the Matcha dough. Divide it into 25g (for pear kernel) and 45g (for pear skin).

Step11:Take out the original dough and divide it into 50g and 80g. Both of them are used to make pear meat, but the smaller one is used to make inner cylinder and the larger one is used to make outer pear shape.

Step12:Rub 25g Matcha dough into a 7cm long cylinder. Then roll 50g original dough into a 7 * 5cm square piece and put it under the cylinder.

Step13:Wrap the square pieces close to the Matcha dough and rub them into a cylinder. If the dough is soft at this time, put the dough cover plastic film into the refrigerator and freeze it for a while before proceeding to the next step. Otherwise, it is not conducive to shaping.

Step14:Roll 80g of original dough into a square piece of 7 * 10cm. Wrap the cylinder of step 13. For the convenience of operation, put a plastic wrap under it.

Step15:Use your hand to make a pear shape. Then use a knife to cut a half centimeter deep groove at the tip of the pear shape.

Step16:Cocoa dough is rolled into thin strips about 7 cm in diameter.

Step17:Insert the cocoa dough into the groove at the top of the pear.

Step18:Continue rolling 45g Matcha dough into 7 * 12cm square pieces, and wrap them u

Step19:

Step20:

Step21:

Step22:

Step23:
Cooking tips:1. If there is no rose sea salt, just use common edible salt instead. 2. The quality of Matcha powder determines the taste and color of the finished product, so don't buy the cheap Matcha powder. 3. In operation. If the dough is too soft, return to the refrigerator for proper freezing before proceeding to the next step. 4. Each oven is different. The temperature time is only for reference. It needs to be adjusted flexibly according to the actual situation. There are skills in making delicious dishes.
 Chinese Food


