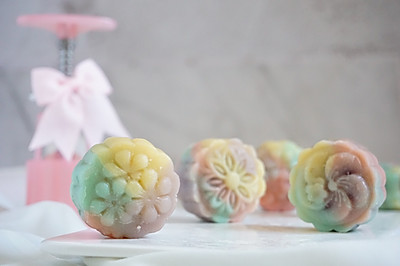
Ready mixed powder fast Kwai style moon cake
(106649 views)
For the first time this year, cantonese moon cakes are made with ready mixed powder. Compared with the previous year's self mixing flour, the operation is simple, the stability is better, and the oil return is fast. Mold. The use of Yangchen's new products. China Wind crystal moon cake mold series. The pattern of flower pieces is very rich. There are suitable for ice skin. Peach mountain skin moon cake. There are also suitable for making cantonese moon cakes. Mold texture is better. Pattern is three-dimensional and the effect of demoulding is ideal.
Cooking ingredients
Cooking Steps

Step1:Peanut oil and syrup are weighed in container

Step2:Mix and stir with hand beater until peanut oil is emulsified and whitened and syrup is integrate

Step3:Sift and add Cantonese ready mixed moon cake powde

Step4:After mixing without dry powder. Cover with plastic wrap. 2 hours at room temperatur

Step5:Yangchen's crystal mould consists of three sets of. 50g two sets of. 75g one set. 50g is 10g for skin and 40g for stuffing. 75g moon cake skin 15g stuffing 60g. Round the filling and arrange the skin according to the weigh

Step6:It's not easy to make gestures by yourself. Take the stuffing with your right hand. Push the skin up from the bottom with your left hand. Push it to the top and smooth it. Rub it round.

Step7:The moon cake mould of Yangchen comes on the stage. I think the lavender pattern in the middle is more suitable for making ice skin or peach mountain skin. The pattern is easy to blur when baking.. Don't ask me how I know. Light blue and 75g on the right are suitable for Cantonese style. The pattern is printed three-dimensional and the final baking effect is goo

Step8:To be on the safe side, we still need to scatter the powder in the mould. Roll the mould to make it adhere evenly. Then knock off the surplus powder lightl

Step9:Roll a thin layer of powder on the wrapped mooncake blank. Not too much. Otherwise, it's easy to crack when bakin

Step10:Put it in the mold. Press it lightly. This time the oven can start warming up. 210 ℃ preheatin

Step11:Finally, press it on the baking tray to release it. This mid autumn festival flower piece is my favorite

Step12:The effect of pressing out the peony pieces is like thi

Step13:After all the moon cakes are pressed and released, prepare a spray watering pot. Spray a thin layer of water mist on the newly demoulded moon cake blank from the high place. This prevents cracking. Send it to the middle layer of the preheated oven. The temperature changes to 200 ℃. Bake for 5 minute

Step14:Come out in 5 minutes... Brush the wall of the container to remove the excess egg liquid. Brush a thin layer on the surface pattern. Don't be greedy. The pattern on the surface of the moon cake will be blurred if there is more egg liquid.

Step15:Continue to put in the oven. Turn 180 ℃. Bake for 8 minutes, then take out and brush the egg liquid again and return to the oven. Bake for 5 minutes.

Step16:Put it out of the oven to cool. Put it at room temperature for oil return. Don't look as ugly as it just came out. After a day, the return oil will be soft and brigh

Step17:After oil retur
Cooking tips:There are skills in making delicious dishes.
 Chinese Food


