Cantonese moon cake
(106943 views)
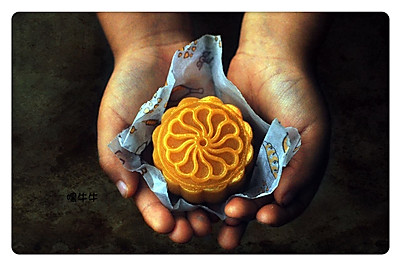
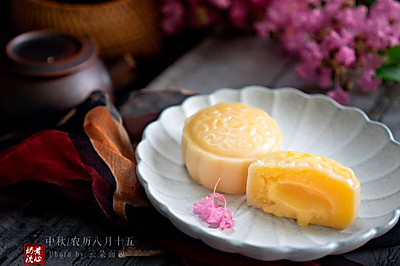
The cantonese moon cake can also have a beautiful face and teeth. It's a 50g Pink Crystal mold for a chef. The patterns of each moon cake are clear enough to choose the difficult household I don't want to. Don't hesitate. Don't be upset. Each flower slice has made a moon cake to squeeze the eyes to squeeze the eyes. The favorite one among the moon cakes is the cantonese moon cake. The oil color of the returned moon cake is attractive, soft and moist. The fragrance of the cake skin and the sweetness of the bean paste Salty egg yolk. Multiple flavors tempt your taste buds. They like pink mooncakes so much. Before they can return the oil, they eat two faces and cover their faces
Cooking ingredients
Cooking Steps

Step1:Add water to syrup. Mix wel

Step2:Add peanut oil to the syrup. Continue mixing until you can't see the peanut oil floating on the syrup

Step3:Add salt to mi

Step4:Add flou

Step5:Press into a ball with a scrape

Step6:Put it in a fresh bag and send it to the refrigerator for 2-3 hour

Step7:In the process of waking up, you can prepare the filling part, weigh 35 grams of lotus paste and egg yolk together, press them into pieces, and wrap the egg yolk

Step8:Wrap the stuffing and cover it with plastic wrap. It's also called standby moon cake skin

Step9:Press the crust ope

Step10:Flatten the crust and put the stuffing on i

Step11:Use tiger's mouth to put away the crust and round i

Step12:Roll the moon cake in the flou

Step13:Take out the moon cake and beat off the excess flour on the surfac

Step14:Install the flower piece in the mould, roll a circle with a little flour, and knock out the flour

Step15:Put the moon cake in the mol

Step16:The time to press the pattern should be skillful. You can't use full force

Step17:The pattern is very clear and beautiful. If the crust is oily enough, it can be directly sent to the preheated oven

Step18:Heat up 160 ℃, heat down 130 ℃, bake for 8 minute

Step19:Break up the eggs and add 1-1 water. Sift again to us

Step20:Take it out. Cool it a little and brush it lightly with egg liquid

Step21:Put it in the oven again and bake it at 160 ℃ and 130 ℃ for 15 minute

Step22:The finished product comes out in a lighter color. I don't like the color too deep. If you like the color a little deeper, you can bake it according to your preference

Step23:Temptatio

Step24:Hazy beaut

Step25:Hazy and clear contras

Step26:Gift box for family and friend
Cooking tips:1. Emulsion syrup must be emulsified in place. The syrup will be full of small bubbles. 2. The recipe I made is 50g. It can be made in the proportion of 3-7. About 10 people like the ratio of 2-8. This can be made in the proportion of personal like. 3. If the cake skin is a little dry before being sent into the oven, spray a little water on the watering can. 4. (this temperature is only for reference. Please make it by yourself There are skills in cooking.
 Chinese Food


