Chocolate cake
(90023 views)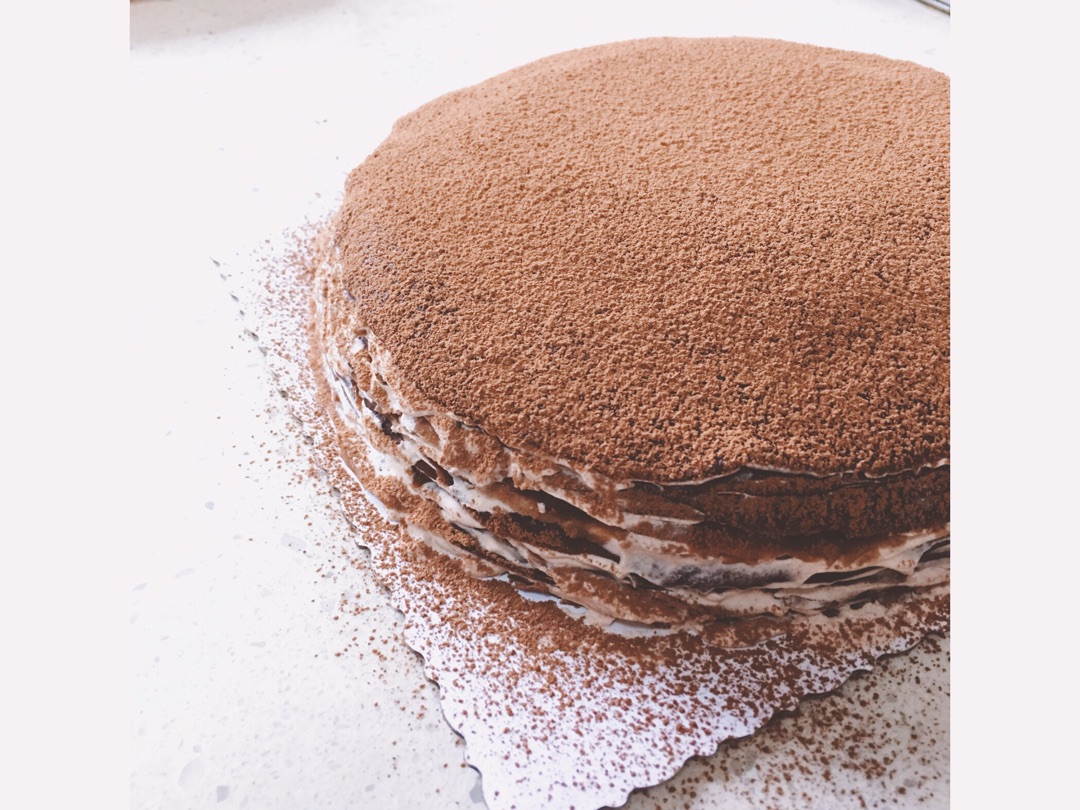
Do you have that afternoon, my dear friend and I were sitting in the awfully chocolate house, eating chocolate cake with thousands of layers, drinking a cup of hot cocoa and talking about the gossip that we laughed off. But after being a spicy mom, maybe this kind of leisure time has become a luxury for me. But the temperament of the spiritual noble will not change. Then enjoy the moment at home. Chocolate entrance. Everything is so beautiful. It seems that we saw the cherry blossom in April (please don't go to the village Park. There are too many people. It's crowded). Let's start.
Cooking ingredients
Cooking Steps

Step1:Prepare the ingredients. Make sure you use the goods well. In my concept, expensive products are good. To be honest, they are not as expensive as those sold in the store.

Step2:Mix the low gluten flour, cocoa powder, sugar powder and salt together for use. Mix the milk and eggs in another container.

Step3:Sift the powder into the milk and egg mixture. Stir while sifting.

Step4:Chocolate batter after mixing. Filter into another container. The batter will be smooth.

Step5:There will be slag on the filter screen. You can use the eggbeater to stir it (let's not waste it

Step6:Melt the butter in water. Cool slightly. Pour in the batter. Stir while pouring.

Step7:OK. We have finished the batter. Put it in the refrigerator for an hour. I think it will help us to finish the next step better.

Step8:(an hour later) take out the chocolate batter. Now it's time to start drying. Remember to mix the batter evenly before each time.

Step9:Preheat the pan (do not stick to the pan. The better the pan is, the higher the success rate is) low heat. I use a 26 cm diameter pan to make a cake of about 8 inches. Use two-thirds of a scoop of batter to make a pancake. It's almost the same when you see the surface of the pancake bubbling.

Step10:Prepare a cold towel nearby. Cool the bottom of the pot. Scoop up the kori cake with a rubber shovel. Put it aside for cooling. (the bottom of the pot must be cooled, or the next piece of batter will coagulate as soon as it enters the pot. The difficulty coefficient will rise.

Step11:The thickness of kori cake must be even. Otherwise, it will affect the taste. You can make 6.7 pieces and put them in the refrigerator to cool.

Step12:All the kori cakes have been finished. Stack the cooled kori cakes one by one. Find a plate of the same size and press it on it. Use a knife to cut off the uneven edges around.

Step13:For cream filling. Mix the sugar powder, cocoa powder and vanilla powder. Pour in the light cream. Use the electric whisk to beat it. I didn't beat it in detail at this step. When the cream is big, there is a small hook on the spoon.

Step14:Put the first layer of crepe. Then a layer of cream. Another layer of crepe. Be patient. Spread the cream evenly, but not too much. I've got about 20 layers. Wrap with plastic wrap. Press a plate on it. Refrigerate for 4 hours.

Step15:Take out the frozen cake. Sprinkle with cocoa powder. Wow. Is it very good.

Step16:Cut it into small pieces. You can taste i

Step17:

Step18:
Cooking tips:1. If it's the first time to make a cake crust, you can try two of them first. The key of this cake lies in the crust. Make sure to use a non stick pot (you can buy one if you don't have one) 2. You can add more sugar powder if you like sweetness. The cakes in the personal task shop are too sweet. 3. Commenting on my recipes helps to improve the success rate. ^_^There are skills in making delicious dishes.
 Chinese Food