Bear cake
(102767 views)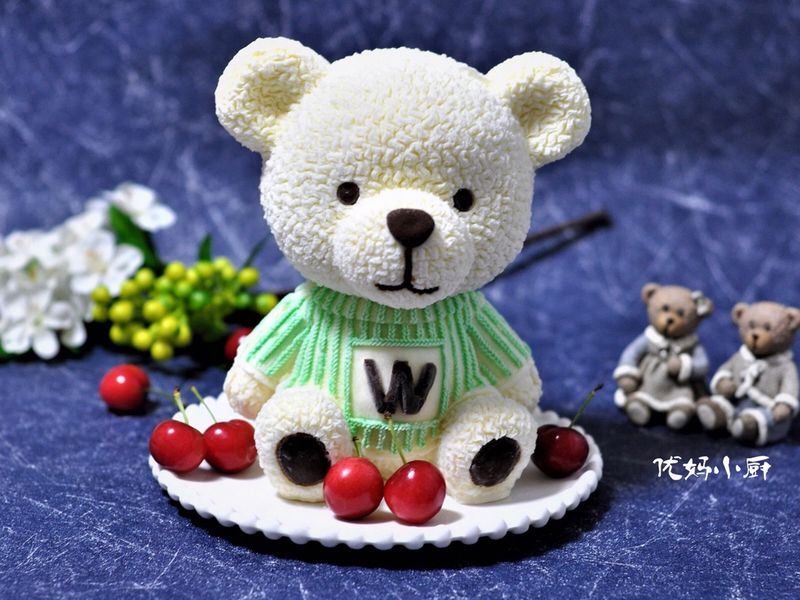
It's said that falling in love with baking means buying and buying endlessly. So am I. I can't help but want to try when I see the new and lovely shapes. Hesitated again and again to start this mold. Failed in the first test. Let me realize how important a good recipe step chart is. The second time when I opened the mold, I decided to write a recipe to sum up my experience and give a reference to baking lovers like me. Don't mind my nagging. The cake inside the bear's head and body part is about 4 inches. Qifeng cake is OK. Please refer to my previous recipe for the method. Or friends can find a basic cake in the bean fruit. In order to prevent the head from falling off, long biscuits can be used to connect and fix the inside. If there is no chocolate pen or pigment, it is OK to use melted chocolate directly. Mold is a must.
Cooking ingredients
Cooking Steps

Step1:Use two color chocolate pens to melt in warm water.

Step2:Use a brown chocolate pen to draw the bear's eyes, nose and feet and letters on the corresponding positions of the mold.

Step3:Draw the stripes of the sweater in green.

Step4:Draw the pattern of the other half's sweater. Send it to the refrigerator for freezing.

Step5:The gilding tablets are softened in cold water.

Step6:Remove the water from the pickled gelatin tablet. Put it in a bowl and melt it in hot water.

Step7:Mix whipped cream and sugar until they are six times distributed, that is, the lines just appear. Melt the cream cheese in hot water until it is free of particles. Pour in milk and mix with the melted gilding slices. Mix well with whipped whipped cream.

Step8:Pour in yogurt and mix well. At this time, mix the mousse a little thin. Use the eggbeater to beat the mousse again until there are lines.

Step9:Coat the interior with a thin layer of whipped mousse. Refrigerate for ten minutes. The reason why this step is frozen is to prevent the appearance of the filled cake from being exposed.

Step10:Take out. Put the cake pieces into the head and body parts. Insert the biscuit stick into the head and connect the body. If not, it's OK. Mainly just in case.

Step11:Apply a layer of mousse. The other half does the same thing. Only in the other half, I only put the head. The body part is filled with mousse. Then put the two parts in the refrigerator for more than an hour. The next step can only be carried out when the liquid does not flow.

Step12:Combine the two parts of the mold. The groove must be tightened. Wrap the mold with plastic wrap.

Step13:Pour in the remaining mousse from the bottom. Fill in the mold. Refrigerate for 24 hours. Because the mold is very thick, we must wait until the internal mousse liquid is completely frozen and then remove the mold. Since you can't see the state inside, it's up to time.

Step14:Remove part of the mold. Uncover the other side.

Step15:Finished drawings.

Step16:Finished drawings.
Cooking tips:There are skills in making delicious dishes.
 Chinese Food