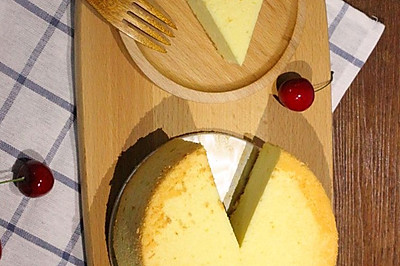
Qifeng cake
(108141 views)
I'm so happy today. The award-winning mold is back. It's the square 8-inch baking tray I've always wanted. As soon as the express delivery arrived, I immediately began to drum up the Qifeng cake that the children like to eat. They used to bake 13 inch cakes 6 A kind of 7 inch mold. Today, I'll try to make 14 inch cake 6 A kind of 8 inch. Groping and adding materials at the same time. Unexpectedly, it made me succeed. It's so exciting. Hee hee
Cooking ingredients
Cooking Steps

Step1:Prepare the required materials - 160g of low gluten flour, 115g of milk, 50g of corn oil, 9 eggs (65g of each egg), 100g of sugar, 2 drops of white vinegar and 1g of salt.

Step2:Use the egg white separator to separate the egg white and yolk. This step is very important. There must not be a little yolk in the egg white. Otherwise, it will affect the egg white. This is the separation of the egg white and yolk. Put the egg white in the refrigerator and refrigerate it. Start preparing the batter.

Step3:Add 50 grams of salad oil, 115 grams of milk and 1 gram of salt into the bowl and mix well. Emulsify the water and oil fully. No oil spots can be seen. It's a bit thick.

Step4:Add 9 yolks one by one and mix well.

Step5:160 grams of low powder sifted into the yolk paste.

Step6:Mix irregularly by hand. Don't stir the batter in circles to avoid the gluten.

Step7:Add 2 drops of white vinegar and 100g white sugar into the protein. Use the electric egg beater to beat the protein at a high speed. When you feel the protein is heavy, change it to a medium speed egg beater. Until you hit the protein like this in the picture and it has a strong small sharp corner. Then change it to a low speed egg beater for a few times. Sort out the bubbles in the protein. You can preheat the oven when you are beating the egg whites

Step8:. dig a third of the protein into the batter. Use silica gel scraper to mix up, down, left and right irregularly.

Step9:Pour the batter into the rest of the protein. Use a silica gel scraper to turn it up from the bottom and mix evenly, so as to prevent the protein from sinking at the bottom. Here, you can only use stir. Cut and stir. If you use egg, you need to use Z-shaped stir. You can't use a blender or circle.. Otherwise, it will be defoaming and defoaming.

Step10:Clean and dry the mold in advance. Lay a layer of oil paper on the square baking tray. Slowly pour the mixed egg paste into the mold. 8 points full. After entering the mold, scrape the surface. Shake several times to make the air bubble out. This way, the cake will be more delicate without big holes.

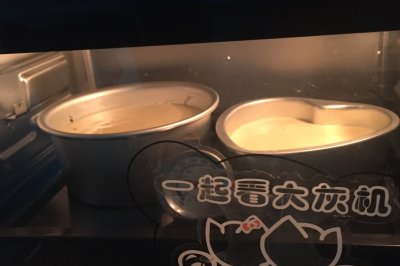
Step11:Put it into the preheated oven, heat it for 120 degrees and lower it for 80 minutes. If the toothpick is inserted into the middle of the cake and the cake is not brought out, it means that it is cooked (the actual temperature is subject to the oven). Generally, the cake is first expanded, then retracted, and then roasted for 510 minutes. It will be mastered if it is done several times. Each oven is differen

Step12:

Step13:

Step14:

Step15:

Step16:

Step17:

Step18:

Step19:

Step20:

Step21:

Step22:

Step23:

Step24:

Step25:
Cooking tips:1. Make sure to turn it upside down. Otherwise, it will collapse. 2. It must be completely cool before demoulding. 3. I bake at low temperature for a long time. It's not easy to crack and it's easier to master the temper of the oven. Skilled can choose high temperature baking. 4. Each oven is different. It depends on the self-regulation of the oven. I only give the reference temperature. There are skills in making delicious dishes.
 Chinese Food


