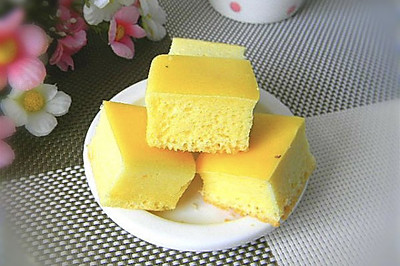
Zebra pattern Qifeng cake (8 inches)
(108495 views)
The first time I saw this zebra pattern Qifeng cake, I was attracted. I tried to make the original quite simple. 8-inch cake slightly modified on the basis of the original formula. The effect is good.
Cooking ingredients
Cooking Steps

Step1:Material group phot

Step2:First of all, the egg yolk protein is separated. The egg white basin must be free of oil and water. The egg white must not be mixed with a little yolk. Otherwise, it is difficult to be dismissed. (I like to separate the egg white and yolk into a bowl. Use a larger spoon to scoop out the yolk. It must not be broken.)

Step3:Separated yolk protei

Step4:Pour corn oil and milk or water into another bowl. Beat with the eggbeater until completely emulsified. No oil stars.

Step5:Put in the yol

Step6:Stir evenl

Step7:Sift in low gluten powde

Step8:Use the Z-shape to mix evenly, make it smooth and free of particles. Do not stir it in circles. It is easy for flour to get gluten. The mayonnaise is ready.

Step9:Start making albumen paste - drop a few drops of lemon juice into the albumen or dip a few drops of white vinegar with chopsticks. I don't have lemon juice and drop about 4 drops of white vinegar. The electric egg whisk is sent at low speed. When the big fish eye froth comes, add 1/3 sugar to continue to send

Step10:Until the bubble is fine, add 1/3 sugar to continue.

Step11:Add the last third of sugar when there are coarse lines or small hooks.

Step12:It's the dry foaming state that we need to pull out the small upright corners (the key to the success of Qifeng cake is whether the protein can be sent to the right place

Step13:Mix egg white and yolk batter - use a soft spatula to take one third of the egg white batter and put it into the yolk batter. Mix well by turning it over. Turn it up from the bottom like a stir fry. Do not stir it in circles, or it will defoaming.

Step14:Stir it. Turn the basin. Mix well in this way.

Step15:Pour the batter into the remaining batter basin and continue to stir.

Step16:This is the batter

Step17:Divide the batter into two parts. Sift one part into cocoa powder.

Step18:Mix evenl

Step19:Take two spoons of the same size. Spoon a spoonful of batter into the center of the 8-inch mold (the spoons should not be big, or the layers are not many. They are not good-looking

Step20:Use another spoon to scoop up a spoonful of cocoa paste and put it on the Yellow paste

Step21:In this way, put the remaining yellow paste and cocoa paste into the mold.

Step22:In this way, put the remaining yellow paste and cocoa paste into the mold. The mold vibrates bubbles under two light shocks.

Step23:

Step24:

Step25:

Step26:

Step27:
Cooking tips:1. The oven temperature is adjusted according to the oven temperature. 2. It's my first time to make cocoa batter. It's a little more than cocoa batter. I think it's better to have more light batter. Do it according to your preference. There are skills in making delicious dishes.
 Chinese Food