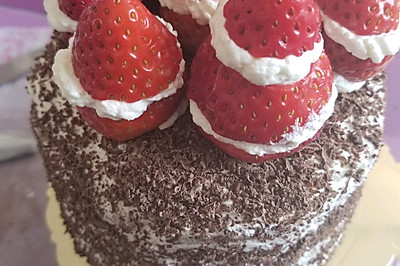
Black Forest Cake (8 inches)
(721103 views)
That day is the sixth anniversary of our belly dance classroom. Our coach invited everyone to dinner. Because of the time shortage, I can only make this cake for her. Because it saves time. I really can't wait for the complexity.
Cooking ingredients
Cooking Steps

Step1:First, the egg is divided into protein and yolk. The container used must be free of water and oil. The egg must also be divided into clean parts. No yolk in the protein is allowe

Step2:Beat the egg white into thick bubbles with the electric beater in the first gear. It's like a big bubble like soapy water. Add 1 / 3 sugar. Open the second gear and continue to beat

Step3:Beat the bubbles and become fine. Add the 1/3 sugar. Open the most upbeat and beat again. Feel the egg whisk sink. The foam is very thin. Close to the butter. Pour all the sugar into the gloss when it is very lustrous. Keep playing until the gloss is getting smaller and smaller. The surface is changed from smooth to slightly broken and lumped. The egg whisk is raised. The protein attached to it is very short sharp. Finished. As shown in the figur

Step4:The egg beater doesn't need to be washed. It's directly used to beat the yolk. Mix the yolk and salad oil. Stir until it's even. No need to beat

Step5:Take a part of the protein. Mix it with the yolk in the same way as cooking. Then take a part of the protein and the yolk and mix it with the same way. Finally, pour the mixed yolk paste into the protein. Mix it with the same way until it is smooth and does not agglomerate. The reason for this is that the proportion of the protein and the yolk is different. Directly mixing the yolk is easy to sink. Slowly mixing can make the two proportions close. It is easier to mix evenly

Step6:After mixing cocoa powder and flour, use a sieve. This can help the pimples in cocoa powder and low gluten flour to disperse. It's easier to mix. When mixing, you can only use the method of turning up from the bottom like cooking. You can't draw a circle. Otherwise, the egg white defoaming is waiting for the egg cake

Step7:After the batter is mixed, preheat the oven to 160 degrees

Step8:Take an eight inch movable bottom mold, wash the oil, dry the water, increase the bowl of batter by more than 15 cm, and let the batter float into the mold in the shape of ribbon. This technique can reduce the big pores in the cake

Step9:Shake the batter mold for a few times. Bubble the atmosphere out. Put an empty baking tray at the bottom of the oven. Put the cake in the middle. Cover the cake mold with a layer of tin paper. Bake for 40 minutes. Quickly remove the tin paper. Then pour a small cup of hot water into the empty baking tray at the bottom. The whole process should be rapid. Do not let the custard touch the cold air. Otherwise, it will collapse

Step10:The bottom layer is padded with baking tray to prevent the bottom from being paste

Step11:

Step12:

Step13:

Step14:

Step15:

Step16:

Step17:

Step18:

Step19:

Step20:
Cooking tips:It's rather wordy this time. Because many of my sisters are still zero based. The reason why they didn't take pictures is that they didn't want to send them. Some people said they wanted to learn from me before sending them. Ha ha, there are skills in making delicious dishes.
 Chinese Food


