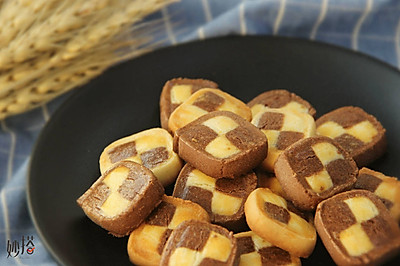
Chessboard biscuit
(90758 views)
I finished the biscuits at home. I made one. The shape of the checkerboard is pretty good. It's very convenient to make without mold.
Cooking ingredients
Cooking Steps

Step1:Prepare the required materials and weigh them for standb

Step2:Soften butter and add sugar powder. Beat with electric beate

Step3:Beat butter until fluffy. Add egg yolk and beat evenly. Add cream in several times and beat (I forgot to beat and add egg yolk

Step4:State of whipping with all cream adde

Step5:Sift low gluten flour into step

Step6:Mix the low flour. Shape the doug

Step7:Divide the dough into two parts, one of which is 10g more than the other. Mix 5g cocoa powder with 5g water or milk, and then add it into the small dough to mix. It is two parts of dough

Step8:Two pieces of dough are divided into two parts and rolled into long strips of the same length. They are pressed into rectangular shapes by hand

Step9:Interlace 4 long dough strips. Apply egg liquid or clear water as adhesive in the middle. After stacking, slightly finish the edges and corners. Refrigerate for half an hour after finishing

Step10:Refrigerate and take out the dough. Cut into slices about 0.5cm thick

Step11:Put it in the oven. Preheat the oven at 200 ℃ for 10 minutes, then put it into the oven for baking

Step12:Heat up and down 180 ℃ and bake for about 18 minute

Step13:Is the checkerboard beautiful?.
Cooking tips:1. The cream added by the recipe needs to be warmed back. There is no cream. Milk can be used instead. 2. It's better to make the cross-section into a square when sorting out the shape of the checkerboard. Only in this way can the biscuit look good. 3. Each oven has a different temper. Adjust the temperature difference by yourself. There are skills in making delicious dishes.
 Chinese Food


