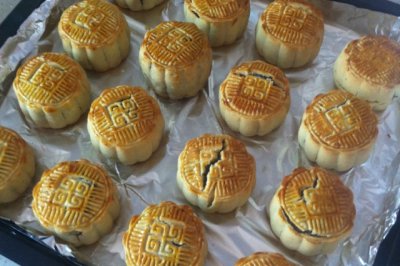
Cantonese moon cake
(95884 views)
It's more than half a month since the Mid Autumn Festival. I can't sit still when I see that everyone is making moon cakes and swiping the screen. From Taobao, I started to look for moulds - 50g, 63g, 75g, 80g and 100g, then for fillings and recipes. There are too many choices. I'm confused. Finally, 75g mold (100g by the way. It's not used yet). The stuffing is stir fried. The sugar oar is boiled. Only Jianshui is ready-made. All right. No more bullshit
Cooking ingredients
Cooking Steps

Step1:Mix the sugar oar, water and peanut oil evenly. Let the sugar oil fully emulsify and sift into high and low flour. Mix well until the dough is smooth, cover with plastic wrap and loosen for more than 2 hours.

Step2:Roasted salted egg yol

Step3:Yolk - if you buy it in vacuum package, first soak it in oil overnight. You don't have to buy fresh salted eggs. Pass in the white wine before the yolk is roasted. Bake in the oven at 150 ℃ for 8 minutes. Bake and take it out to cool it.

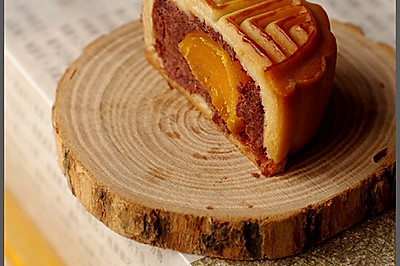
Step4:Prepare lotus seed paste. Look at the weight of each yolk. If it's 1315g, then lotus seed paste is 3537g. In short, lotus seed paste + yolk is 50g.

Step5:Stuffing - dough with lotus seed paste. Press it into a small pie. Put on the yolk. Slowly push the lotus seed paste upward with tiger mouth. Wrap the yolk in the stuffing with lotus seed paste. Then knead it to make sure there is no yolk outside. Wrap all of them with plastic film on the back cover to prevent water evaporation.

Step6:When the dough is relaxed, it doesn't need to be mixed any more. It's divided into 25 grams. Also knead and cover with plastic wrap.

Step7:Flatten the moon cake skin on the palm of your hand. Put in the lotus egg yolk filling. Slowly push the lotus egg filling up with tiger mouth to wrap it. It's better to rub it gently. It's a technical job. Take it slow. Don't rush. Practice makes perfect. It'll be packed in the back. Roll in the flour after wrapping. Stick a thin layer of flour on it. Or sprinkle the flour in the mould and shake out the surplus flour.

Step8:Put the dough into the mold. Press it forward a little. Press it gently all around. Then put it into the baking tray to press out the pattern. When pressing the pattern, grasp the strength. It's too light to press out the pattern. It's too heavy to deform. (I repeated this step several times before pressing out the effect

Step9:After all the mooncakes are pressed, the oven is preheated to 200 degrees. Spray a little water on the surface of the mooncakes. Spray high into the air. Let the water mist fall on the mooncakes naturally. This can prevent the moon cake from cracking during baking.

Step10:Bake in the middle of the oven for 5 minutes. Then prepare an egg yolk to break. Take out the mooncake 5 minutes after baking. Now the oven turns to 180 degrees. Brush the yolk liquid on the moon cake when it's a little cold. Use a hairy brush to dip the egg liquid and scrape off the extra egg liquid on the edge of the bowl. Otherwise, too much egg liquid will make the common pattern of the moon cake unclear. Brush gently on the protruding part of the moon cake pattern, and then brush the point on the side.

Step11:Put in the oven again 1

Step12:

Step13:

Step14:

Step15:

Step16:

Step17:
Cooking tips:There are skills in making delicious dishes.
 Chinese Food