Car cake
(98378 views)
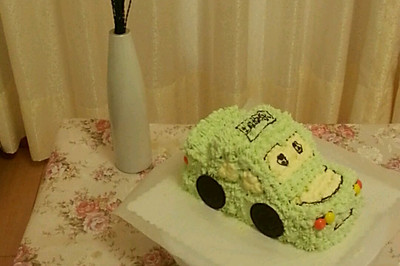
One night I was lying in bed. I suddenly wanted to make a car cake for my second dog. I imagined his happy expression. I couldn't wait Today I finally pull the grass. First bake an eight inch Qifeng cake for the bottom (the recipe was distributed yesterday). The fruit in the middle is mango. For the sake of health, 250ml of cream has not been used up. Only a thin layer has been applied. Do not want to use pigment. Choose to use red heart dragon fruit color. So it is light pink. First time mounting. Forgive me for my poor technique. It seems that each flower body is not so symmetrical on the surface Anyway. I've been busy all afternoon. It's finally finished.
Cooking ingredients
Cooking Steps

Step1:This is a baked Qifeng cake.

Step2:Cut like this. In the middle is the body of the car.

Step3:Cut off a little more on both sides.

Step4:The body is cut in the middle.

Step5:Dice a mango.

Step6:Whipping cream and sugar in electric mixer at medium speed. I played it for the first time. It was very successful.

Step7:Apply a layer of cream to the middle of the car. Put the mango dice. I have 250ml cream. It's not rich, so I've applied it thinly.

Step8:And cream on it.

Step9:Cover it. Spread cream on the surface. Put the cut sides on it. Also spread on the sides for bonding.

Step10:If the rear part is too long, it can be repaired again. It can also be used freely to build the car it likes.

Step11:Cream it all over. I think others use 400ml cream. I'm really afraid it's not enough. So I put on a thin layer. It doesn't matter. It's thick. It's troublesome if the mounting is not enough. Besides, it's better not to eat so much cream. Pay attention. Thicken the positions of the front windscreen and the windows on both sides, because they should be exposed. Oreo biscuits stick to the wheel. Put a bit of cream in the mounting bag. Cut a small hole and outline the wheel. Then stick on two reversing mirrors with a piece of Oreo scissors. Use toothpick to draw the outline of car logo, windscreen and windows on both sides.

Step12:Black Qiao melts in water. It's put into a mounting bag. Next time I'm going to try to melt it directly in a framed bag.

Step13:Cut a small hole in the bag. Draw the outline according to the toothpick. You can play it freely. I have no experience in the first time. When I draw a line and leave, I will take a small tail. It's not too troublesome. Every time I break it with a toothpick.

Step14:Take a little fire dragon fruit and cut it.

Step15:Put it in the soybean milk strainer. Press out the juice with a spoon.

Step16:As shown in the picture, I'm afraid that too much juice will affect the cream. It turns out that it's OK.

Step17:Use the electric egg beater to beat it into a light pink color. Natural things can't be as gorgeous as the color of pigment.

Step18:I used a small five tooth flower mouth. The first time I mounted flowers, it was not as hard as I expected. But it was not so even. The overall effect was good from a distance. It's enough to fool laymen. Ha ha. I have to continue to practice. There's not much cream for mounting. There's still some left. I'm going to make my son a cupcake with flowers on it.
Cooking tips:There are skills in making delicious dishes.
 Chinese Food


