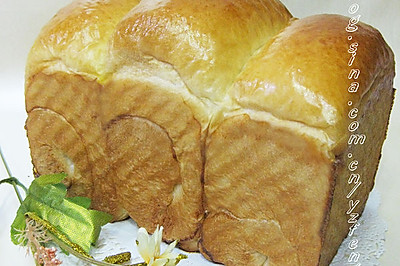
[cheese toast] - one of the favorite toast
(73382 views)![[cheese toast] - one of the favorite toast](https://cp1.douguo.com/upload/caiku/4/e/c/yuan_4e8ee36fe0a9ca2bf981408a39c898bc.jpg)
This recipe comes from the blog of liberty. It's a very early blog. You can go to her blog directly if you are interested in it. This recipe is very similar to the one I matched before. So I became interested in it as soon as I saw it. I knew it was absolutely excellent. The finished product was amazing. Just knead more dough. Good toast has a good feel. The dough of this toast is oily and smooth. It is elastic. The toasted toast has a smooth skin, but it also presents a charming brown. It's very nice. Before, I had a recipe of my own - yoghurt and cheese bread. It was called Er naibao. At that time, this recipe had a good reputation in Weibo. It was also the first recipe I matched. Such success greatly improved my enthusiasm for making bread. Yogurt and cheese are very good humectants. Although it's direct method, the bread is still soft the next day and the third day. It's amazing. Attached with relevant links (the links need to be copied to the address bar to check again) yoghurt and cheese toast-
Cooking ingredients
Cooking Steps

Step1:Ingredients - 260g high powder, 35g fine sugar, 2.5G salt, 90g milk, 40g whole egg, 3G dry yeast, 70g cream cheese and 20g butter.

Step2:Soften cream cheese at room temperature. Put it in a mixing bucket with milk.

Step3:Put in materials other than butter.

Step4:Stir to expansion stage.

Step5:Add softened butter cut into small pieces.

Step6:Knead until it is complete. Round the dough. Cover with plastic film. Ferment at room temperature.

Step7:Double the dough. Check it out - the dough doesn't collapse when you dip your fingers in the powder and poke holes.

Step8:Divide the dough into three groups. Cover with plastic wrap and relax for 20 minutes.

Step9:Roll the dough twice. Roll it into a tube. Do the same for all three dough.

Step10:Place the dough evenly in the mold.

Step11:The second fermentation is carried out in a warm and humid place (temperature is 38 degrees. Temperature is about 80%); the dough is 89 points high when it is sent to the mold. The dough can be roasted with a little elasticity after lightly pressing the fingers.

Step12:Preheat the oven. Lower layer. Heat up and down. 180 degrees. 35 minutes. Cover the top with tin paper after coloring.

Step13:Demoulding shall be carried out immediately after being discharged from the oven. Heat dissipation shall be carried out on the drying rack. The bread shall have a relatively high expansion. After being taken out, it is better to put it on the side for a while to avoid concave waist.

Step14:Now this day (no heating. The room temperature is less than 10 ℃). I have to take advantage of it to get such a fascinating drawing.

Step15:But it's not good to take pictures in the evening. So. In order to take another picture of the whole body in the daytime, I have to give it a concave shape. It's pretty beautiful. It doesn't affect the delivery of people. Ha ha~
Cooking tips:There are skills in making delicious dishes.
 Chinese Food


