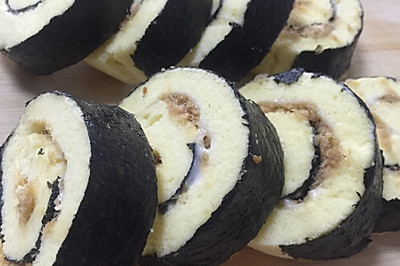
Whirlwind cake roll red velvet
(111604 views)
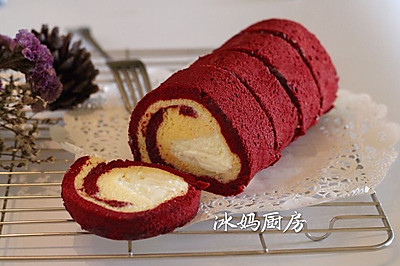
Last time I made the cyclone roll of cocoa. It was the reverse roll. This time I tried the positive roll of red velvet. The pattern is beautiful.
Cooking ingredients
Cooking Steps

Step1:Mix the red koji rice flour with 13g water. Cover with safety film to prevent drying. Reserve.

Step2:First of all, the egg yolk protein is separated. The egg white basin must be free of oil and water. The egg white must not be mixed with a little yolk. Otherwise, it is difficult to be dismissed. (I like to separate the egg white and yolk. I like to beat them all into the basin. Then I use a spoon to scoop out the yolk. It must not be broken.

Step3:Pour corn oil and milk or water into another bowl. Beat with the eggbeater until completely emulsified. No oil stars.

Step4:Sift in the low powder. Mix it with a zigzag pattern until there is no dry powder

Step5:Add the yolk and continue to stir in the zigzag shape until the batter is fine and free of particles

Step6:Mixed egg yolk past

Step7:Add the yolk and continue to stir in the zigzag shape until the batter is fine and particle free (this recipe uses the back egg method. It is said that the back egg method can better support the cake body. Can reduce the failure rate of Qifeng cake. Taste more delicate) mix well.

Step8:Adjust the medium speed until the bubble is fine, then add 1/3 sugar to continue sending.

Step9:Add the last third of sugar when there are coarse lines or small hooks.

Step10:Just send it to the wet foaming state that can pull out the hook. You don't need to send it too hard to make cake rolls.

Step11:Use a soft spatula to take one third of the albumen paste and put it into the yolk paste. Mix well by turning it over. Turn it up from the bottom like a stir fry. Do not stir it in circles, or it will defoaming. Stir it. Turn the basin. Stir well in this way. Pour the batter into the remaining bowl and continue to stir.

Step12:Separate 150g batter into a separate bow

Step13:Pour the rest of the batter into a greased baking tray. Scrape it flat.

Step14:Add 150g batter into red koji rice flour and stir evenly. Do not circle.

Step15:Put it into the decoration bag. Cut the small mouth of the decoration bag. Draw a line and squeeze it onto the white paste. Fill the pan.

Step16:With a scraper.

Step17:Insert a finger into the bottom of the pan. Draw left to right, then s, then right to left. Fill the pan all the way

Step18:Change 90 degrees and continue to draw perpendicular to the original change direction.

Step19:It's the trend in the picture. First draw blue, then red.

Step20:When all the paintings are finished, use a scraper to smooth them out. Preheat the oven at 170 ℃ for 20 minutes.

Step21:Bake and take ou

Step22:

Step23:

Step24:

Step25:

Step26:

Step27:

Step28:
Cooking tips:Oven temperature is adjusted according to your own oven. 2. Parallel to the last pattern roll. Otherwise there will be no pattern. It doesn't matter if you can't tell. Cut off the corners with a saw blade. Place the patterned ones on both sides of the roll. There are skills in making delicious dishes.
 Chinese Food