Rose bread
(102876 views)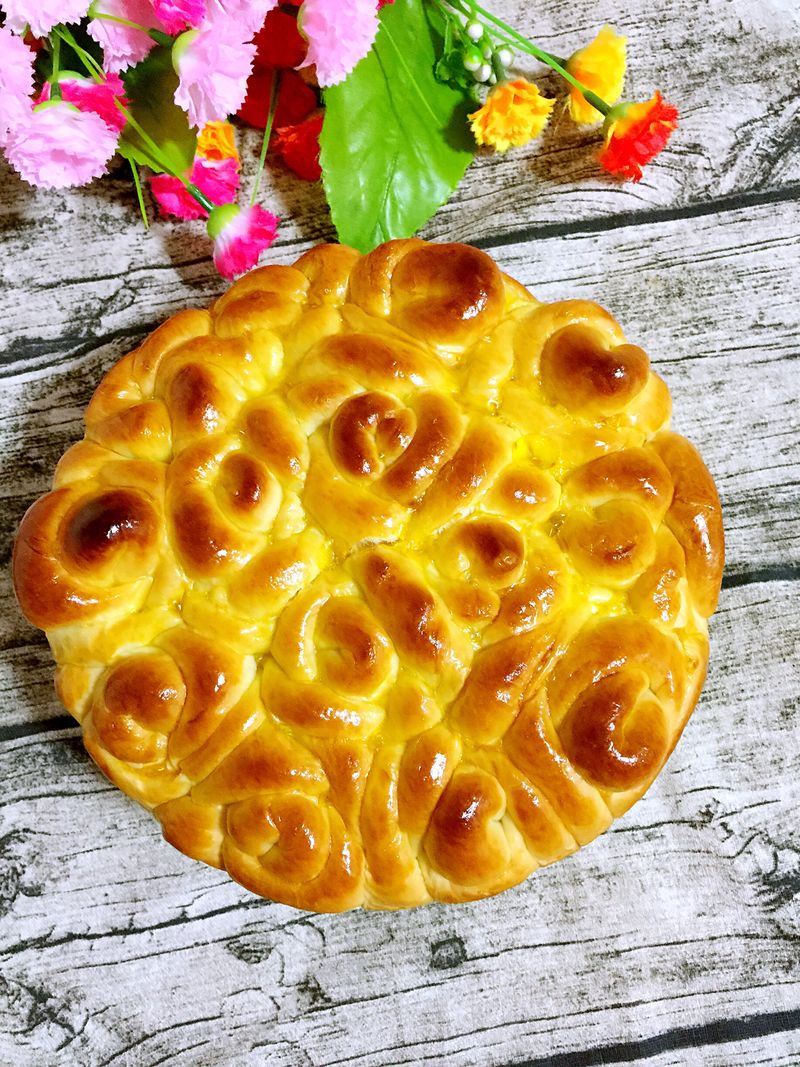
Romantic rose bread ~~~~ Valentine's day, you can make such a bread for your favorite one. It's economical and affordable. Why not do it?
Cooking ingredients
Cooking Steps

Step1:Prepare the required materials - bread flour 300g salad oil 20g egg liquid 30g Cream 30g milk 130g sugar 50g salt 2.5G yeast 3.5

Step2:Put the salt and sugar diagonally. Add the egg, milk, salad oil and cream into the barrel of the bread machine. Then add the bread powder. Dig a small hole on the top and put the yeast into it. Start the kneading procedure. Without the bread machine, you have to knead it by hand.

Step3:After kneading the dough, continue to knead out the film. (if it's butter, wait until the dough is well kneaded, and then add the softened butter to continue kneading. I just ran out of butter at home. I changed it into salad oil.)

Step4:Just rub out the beautiful glove film.

Step5:Take out the bread machine by turning the knife, cover with plastic film, and directly use the bread machine for the first fermentation. The fermentation is twice as large.

Step6:Take it out and rub it evenly. Divide it into 15g small dough. 35 dough in total. Roll it round. Cover with plastic wrap and relax for 15 minutes.

Step7:Roll the dough into round pieces. 5 overlaps. Press between chopsticks.

Step8:Roll up from the bottom. Half cut is such a pattern. It's not a rose shape. Many people don't know the shape of a rose. It's just to show the effect of rolling up in different directions. Roll down from the top. Half cut is an authentic rose shape. (you can also choose to roll from top to bottom or from bottom to top according to your preferences.)

Step9:Put them into the 8-inch mold in turn. I use a non stick mold without painting. (if it's Qifeng's mold, brush a layer of butter

Step10:Put a bowl of hot water next to the baking tray. Make the second fermentation.

Step11:Ferment to twice the size.

Step12:Brush the surface with a layer of egg liquid.

Step13:Preheat the oven in advance. 150 degrees. In the middle. 26 minutes or so.

Step14:In the last few minutes, pay attention to the change of the bag inside the oven. When the color is satisfactory, cover the tin paper in time.

Step15:Demould as soon as it comes out of the furnace. Cool it on the net.

Step16:Look at the organization in it. It's very good. It's soft.

Step17:Finished product drawin

Step18:Finished product drawin

Step19:Finished product drawin

Step20:Finished product drawin

Step21:Finished product drawin

Step22:Finished product drawin

Step23:Finished product drawin

Step24:Finished product drawin

Step25:Finished product drawin

Step26:Finished product drawin

Step27:Finished product drawin
Cooking tips:Bread with cream is more delicious. It's soft. If there is no cream, use milk instead. Pay attention to the color change at the end of baking. Cover the tin paper in time. It is not necessary to brush grease for non stick mould. It is convenient for demoulding. The temperature difference of each oven is different. The setting time and temperature of the oven are adjusted according to the temper of the oven. There are skills in making delicious dishes.
 Chinese Food